2017年12月14日 星期四

Videos - Add nadir mirror balls to 360 photos

I posted how to play with nadir of 360 photos, including adding mirror ball using Android Photo Editor (Macgyver).

Photo Editor updated version can colour the add image used in the process.  So I made new videos for you to share the fun.


You need the Photo Editor Apps to complete all process.  Well, any photo editors with similar functions shall do too.

1)  Make nadir mirror ball


2) Colour the ball- exposure/ saturaton/ contrast/ tint, etc.


3) Varitions


2017年11月19日 星期日

Finding Coordinates of Reference Points with (Android) Photo Editor (Macgyver)

[no need to use the steps on this blog as Hirota San has built in a calibration program in the latest version.  See the demo mentioned on Play store] 


Thanks Yochi Hirota for his great Apps
(Misphere Converter), and Jānis Bertrands for the generous finding the correct points and compiled a calib.txt for me, and both for showing us how to do it using Windows Paintbrush (finding coordinates of the reference point).
Below shows how to use Android Apps to find the coordinates
(Photo Editor (Macgyver) >Crop function)
and
save it to calib.txt
(Simple Text Editor)

PHOTO EDITOR> CROP

Use upper left corner as the pointer and read the left coordinates, scren capture for easy recall


SIMPLE TEXT EDITOR 

KEY IN THE NUMBERS, SEPARATED BY A SPACE, LEFT THEN RIGHT, NEW LINE FOR TGE NEXT PAIR
SAVE AS calib.txt AND COPY INTO MISPHERE CONVERTER FOLDER.


SHARE THE PHOTO TO MISPHERE CONVERTER


Done


2017年10月7日 星期六

Overlay itself to improve bright sky dark ground

(You need Android Photo Editor (Macgyver) to follow the steps, see my earlier blogs on how to use)


Original dark photo (removed nadir and purple fringes)

Added same photo on top, screen mode.

Repeat to get a brighter image

Repeat again to get brightest image

Step 2, Edit> Overlay, choose different brightness photos for different zones

Use the mid bright photo as the base, overlays the entire upper part with the darkest photo, the in-photo-border must be soft whereas the image border should be hard or stitch line will show - simply extend the soft borders beyond tge image borders.


Then, overlay using brush tool, to adjust or enhance different spots: 


Lastly, use Edit> Colour, brush tool, to raise the darkest area, indicated in yellow above.

This is the end product.


2017年9月22日 星期五

(Android) Remove Yourself on 360 Photo with 'Overlay', (Macgyver) Photo Editor


You need
1. The Apps
2. 360 photo taken twice with tripod, taker stood at different locations.


Opens one of them in the Apps

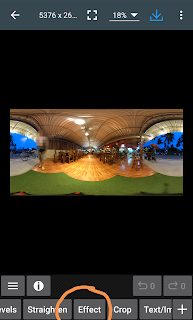
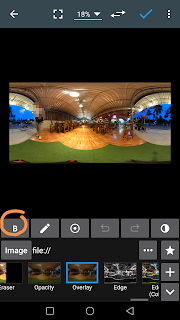
Effect> Overlay 
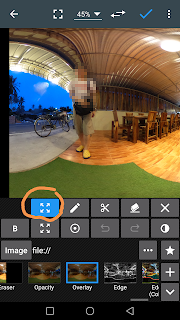
Use brush tool to draw the overlay area, use move, undo, eraser to adjust
 

3     


Select the overlaying image (the other photo with you stood at another position).  There is adjustment x y option to fine tune/move the overlay if necessary
    

Done.
If you need to remove nadir, share it to Theta Converter Pro to roll up 90°.  Then patch the nadir with your favourite apps.  I use Photo Editor or Snapseed.  Then roll down and adjust level with Theta Convertor Pro.